Vietspices Search

Thursday, June 16, 2016

Gỏi Gà (Rainbow Mix Chicken Salad)

click the picture for better image quality

There's absolutely no better season than late spring, early summer to enjoy the bounty of greens and vegetables it has to offer. Lately, I've been serving my family an abundance of everything fresh. I appreciate fresh, locally or home grown ingredients, cooking from scratch, and pouring your heart into each dish. 

One of the dishes I made for my family recently - and my husband loves everything in this dish - is the rainbow mix chicken salad. If you love colors, if you love spice, if you love complex flavors then this is your kind of salad.

This salad has more than just greens and veggies. The vermicelli bean noodle is a translucent noodle made from mung bean starch which gives it a chewy texture and neutral flavor to the dish. The shredded chicken is super tasty as it soaks up all the wonderful flavor. Even if you don't like greens, you can always enjoy the chicken. 

All of these delicious ingredients with their vivid colors, complex texture and dazzling greens tossed in a light coconut water fish sauce blend into a mouthwatering cornucopia of a salad that will please your palate while giving you the nutrition you need.
*
RECIPE: Rainbow Mix Chicken Salad


*
Ingredients


for chicken
1 free-range chicken, available at Asian market
2 whole garlic, peeled
ginger, about 2-inch , sliced
5 shallots, or 1 large onion, peeled, cut into halves
salt
rock sugar or regular sugar
*
for salad mix


1 red bell pepper
1 yellow bell pepper
1 orange bell pepper
8 red radishes
1 package, 1.75 oz, micro rainbow mix (use cabbage, mint leaves, cilantro as a substitute)
2 bunches vermicelli bean noodle
roasted peanuts, for garnish
*
for fish sauce dressing
1 cup coconut water
1/4 cup fish sauce
1/4 cup sugar
4 cloves of garlic, finely chopped
1 tablespoon finely diced green sweet bell pepper
1 tablespoon finely diced red sweet bell pepper
1 Thai bird's eye chili pepper
1 1/2 limes, juiced with pulp
*
for pickled radishes, optional 
1/8 cup vinegar
1/8 cup sugar
1/2 cup water

Directions
*
Cooking Chicken


In this recipe, I bought free-range chicken from Asian store which is leaner and smaller. The size of it is about 2/3 of the standard American chicken. This type of chicken doesn't have much meat but the meat is firm and a little bit chewy, and with a somewhat sweet flavor. The cost is in the $10-13 range for a whole chicken. If you use other type of chicken, you might need only half of it.

In a large pot, add water, ginger slices, garlic, shallots, or onion, some salt and sugar, and bring to a boil.


Add a chicken and bring it back to a boil, reduce the heat and continue cooking for another 10 minutes. Turn off the heat. Cover and let it sit in the pot for another 15-20 minutes. Remove the chicken, and let it cool down completely. Shred the chicken and set aside.Toss the chicken bones back in the broth pot and cook it at low heat to extract more flavor. You can use this broth for your other dishes.

*
Prepping Bell Peppers


Cut bell pepper lengthwise and cut out core, then slice the quarters into thin strips.
*
Prepping Radishes


Trim the top and bottom off each radish. Wash them thoroughly. Cut radish into thin slices.  Immerse radish slices in a bowl of water to keep fresh.  You can toss all of these raw radish in the salad but I used half of the radish slices to pickle as my husband likes both tastes and and textures of the raw and pickled radish.


To pickle the radishes, combine the ingredients for the pickled radishes and mix well until dissolved.  Add radish slices.  Set aside. Radish loses its red color and turn the slices into pink as they immerse in the vinegar mixture.


When it's time to toss the salad together, remove the radishes from the vinegar mixture and let the water drain out before adding to the salad.
*
Mixing Fish Sauce Dressing


Combine all the ingredients for the fish sauce dressing and mix well. The purpose of adding finely diced red and green sweet bell peppers to the fish sauce dressing is to make it look more appealing.

*
Cooking Vermicelli Bean Noodle
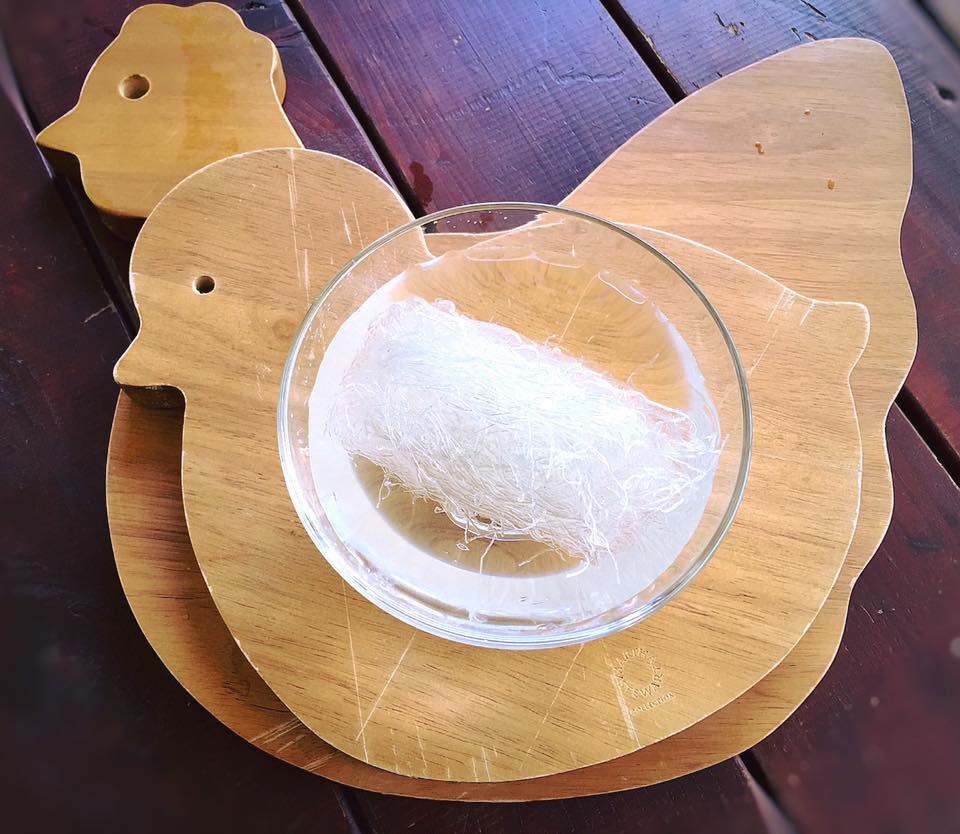


Soak the noodle in a bowl of water until soft while waiting for a small pot of water to boil. Remove noodle from the water bowl. Drop it in the boiling water pot for no more than a minute until translucent. Pour it out into a colander and run it under cold water. Drain.  Set aside.

*
Tossing Salad


In a large mixing bowl, add all the ingredients except the micro rainbow mix and half of the fish sauce dressing. Toss it well.


I like to use my hands to toss so that all the ingredients will be evenly distributed.
Just right before serving, add the micro rainbow mix and lightly toss it so that these delicate greens won't get bruised (I learned this after the first try :-)). Save some for garnish.


*
Presentation


Transfer rainbow mix chicken salad to a serving plate. Sprinkle the remaining micro rainbow mix on top of the salad to add the fresh flavors and visual appeal to this dish. Garnish with roasted peanuts. Enjoy!

*
Eat well. Stay Healthy.

Tuesday, June 14, 2016

Mực Nướng (Grilled/Broiled Squid)

click the picture for better image quality

My family has been taking advantage of the extended daylight to grill out in our backyard. The best thing about summer grilling is the endless creativity with how and what you can cook. Almost anything can go on the grill, from fruits to sticky rice, vegetables to seafood. Grilling brings out the natural inherent savory sweetness of the food.

One of the grilled or broiled seafood my family really enjoys is squid. This grilled or broiled squid is an enticing appetizer for anytime of the day. The smell of charred squid might be unpleasant for some, but for me, it's like inhaling a refreshing salty ocean breeze that's been marinated. The wonderful smoky scent waffling through my backyard readies my appetite for that delicious first bite.

Grilled squid sounds gourmet and it's inexpensive and surprisingly easy to prepare and cook. You can easily find squids at almost any Asian supermarket by the seafood section.

*
RECIPE: Grilled/Broiled Squid
Ingredients


1 large squid 
yakitori sauce
assorted chili pepper, nanami togarashi 
green onion, diced
a lemon, optional
olive oil
*
Directions

Preparing Squid


Regardless of how you like your squid cooked, it must be cleaned by removing the beak, eyes and interior organs. Cleaning the squid is not hard but can be very messy. If you are not  careful, the squid ink and gut can splat everywhere so do it over the sink.

Hold squid firmly between the eyes and body an pull the head and tentacles out of the body.  The guts will come along with the head. Sometimes, I find it easier to remove the guts and quills (look like a plastic strips) by sticking my hand inside the body and pulling everything out. It may seem gross at first but  it's just a squid. 

Cut the head from the tentacles by cutting beneath the eyes. Discard the eyes and head, keeping the tentacles.  Remove the beak from the tentacles by pinching it out from the center. Pat squid dry with a paper towel.

Squid ink is also used in foods to create a deep and rich flavor associated with unami, black color, and salty flavoring without any sodium. Some stores like William Sonoma or Amazon sell squid ink in a jar.  If you want to save the ink, there are 2 ink sacs: the main ink sac in the body attached above the head and is a silvery sack with black liquid inside; the other other smaller one is behind the eyes. Carefully detach the ink sac by slipping a knife underneath and cut away from the center and drain the ink into a bowl to use later. The shelf life of squid in the refrigerator is 1-2 days. You can extend this to 3-5 months in the freezer.

Squid ink is naturally high in glutamic acid, which means it can cause side effects in some people who are sensitive to other sources of glutamates, like MSG.
*
Broiling/Grilling Squid


Brush or spray the top rack of broiler pan with oil. Stack the rack on top of the bottom tray pan to catch drippings. Place squid on the rack. Brush squid with olive oil and place the squid tray in the oven on the top oven rack, broiling on high (500 degrees) for 5 minutes. Remove squid.


Brush squid with yakitori sauce and put it back in the oven and broil until charred and cooked, about 2 minutes. The reason I don't brush the yakitori sauce from the beginning of the broil process is to prevent the sauce from burning when being cooked for too long.


If you prefer grilling the squid, spray the grill press with oil.  Brush squid with oil and using a grill press, cook on high temperature, until charred about 6-8 minutes, depends on the size of squid. Avoid cooking squid too long as it will leave you with rubbery, chewy squid.


*
Presentation


Cut the squid into slices.


Transfer squid onto a serving plate. Use a clean brush to brush the squid with another layer of yakitori sauce.


Garnish with green onion, sprinkle assorted chili pepper, and a few slices of lemon.


My girls like to enjoy this tasty broiled squid with a squeeze of fresh lemon juice.
*
Eat well.  Stay healthy. 

Thursday, May 26, 2016

Cua Xào Me (Dungeness Crab Sautéed in Tamarind Sauce)


Sipping hot caramel macchiato - decaf mind you - with the screeching sounds of the espresso machine, the chitchats in the background and coffee house music playing overhead somehow provides the perfect ambiance for blogging.

A couple weeks ago, I had family friends from Portland, Oregon visiting for a couple of nights.  Interestingly, my guests are pescetarians so I had the chance to cook a few seafood dishes for them and my family to enjoy.

Dungeness crab sautéed in tamarind sauce was one of the dishes. This sweet, succulent treasure of the sea - is cooked in a delicious tamarind, chili, garlic, shallots, onion, ginger, brown sugar, fish sauce with a lovely fresh kaffir lime leaf flavor imparts a wonderful fragrance to the dish. 

Tamarind is a fruit that is popular in the food of Southeast Asia, North Africa and India. Tamarind tree produces long, curved, brown hard outer pods filled with brown seeds, surrounded by a sticky, reddish brown pulp which can be very sour and citric taste with a hint of sweetness. Here in America, at least where I live, it's hard to find the fresh sour tamarind pods but tamarind paste and concentrate tamarind are available in many Asian markets, and Latin American.


The fondest memories of my childhood come flooding back as I am blogging about tamarinds. I was under 10 years old. After school, my friends and I would walk to a small snack stand on the street nearby and treated each other snacks. Back in those days, we appreciated every little thing we had, including something as simple as tamarind. Without fail, there was an insatiable yearning, lip-smacking, mouth drooling, face cringing reaction with every little bite. The green, not-fully-riped tamarinds eaten with a mixture of salt and fresh red chili pepper paste was the best. Tamarind was one of those snacks that brought us together - eating, laughing, and creating our childhood memories.


As I grow older, I am hesitant to bite into one because of the sourness.  I can't eat sour fruits anymore.  Instead, I love to incorporate the sour and citrus fruits especially tamarinds into my recipes to brighten up the flavor and naturally enhance the color in my dishes.

Kaffir lime leaf is one of the ingredients that I used in this recipe. It may be hard to find at the market but you might find a kaffir lime tree at the nursery. In my vegetable garden, I grow both yuzu and kaffir lime trees. I was lucky enough to find them both at my local Costco. It has a distinct citrusy flavor that can't easily be substituted. If the recipe calls for kaffir lime leaves and you can't find any, skip the leaves.


This tamarind dungeness crab will make a perfect finger food for any seafood fanatic. It's not a dish for dainty dining. The real way to eat crab is with your hands, squeezing the shells, snapping them in half, slurping the crab meat out of the legs. Oh yeah, licking your fingers is a part of enjoying this meal.
*
RECIPE: Dungeness Crab Sauteed in Tamarind Sauce
2 live dungeness crabs, about 1 1/2 lb-2 lb each 
1 tablespoon finely chopped garlic 
2-3 shallots, thinly sliced
6 kaffir leaves, bruised
1 tablespoon julienned ginger 
1 onion, cut into wedges 
a handful of Thai basil leaves 
For Sauce:
1/4 cup fish sauce 
1/4 cup + 2 tablespoons brown sugar 
4 tablespoons tamarind paste
1/2 teaspoon black pepper
1 teaspoon chili garlic sauce 
*
DIRECTION

Preparing Crabs


To make it easy to handle crab, I put it in the sink and pour on sink hot water.  Clean the crabs (I used a toothbrush to brush the body, claws, and legs of crab) and rinse thoroughly. 

Twist off the 2 main claws from each crab. Set aside. Hold the crab upward and pull the shell away from the body.

The liquid that will come out from the inside of the shell is called crab butter. Reserve the crab butter.  Using a small spoon to scoop out the brown and corals from the inside of the crabs into a bowl. Discard the shell if you don't want to use it for presentation. 


Pull the spongy, feathery inedible gills off from both sides of the body and discard them. The mandibles are the mouth parts at the front of the crab. Break them off and discard. 


Using a cleaver, cut the crab into quarters and slightly crack the claws.


*
Preparing Tamarind Sauce


Place all of the sauce ingredients into a bowl, whisk together.

*
Cooking Crabs


In a pot, heat the oil. Add the garlic, shallots, ginger, kaffir leaves, onion and cook until slightly golden and fragrant.


Stir in the crab butter.  Add crabs and mix it well. Cook for a minute and add the tamarind mixture. Constantly toss the crab to ensure crab pieces are coated with the sauce. Cover and cook at medium-low heat for about 6 minutes, stirring often. 


 Add basil leaves, stirring well. Cook for another 2 minutes.

Adjust the seasoning if needed. It should balance the sour taste of the tamarind, and the sweetness from the brown sugar and onion. 
*
Presentation


It's finger-lickin-good kind of food so don't be afraid to dig in. The crab sauce can be eaten with steamed rice or a loaf of French bread. Enjoy!
*
Eat well.  Stay healthy.