January and February are neither spring nor winter but their own distinct mix - at least in my part of the world. Certain day, it's icy cold and raw in the morning and all I want to do is to stay cozy inside the house. After the heavy rain and thunder rolled through the weekend, the sun shines once again and it reminds me of spring awakening. I took a walk in my yard to be reminded of the wonderful and wild gift of nature like the smell of rain-wet earth and the soothing and mild sweet scent of jasmine that made me forget - at least momentarily - of my chores.
Thinking of Spring makes my heart sing. I hope it roars this season. Here's to your Spring!


 |
| Pooh and my shadow |
As I mentioned in the previous post, when the Vietnamese new year (Tết) begins, it marks the arrival of spring. It's only nine days left until that day. My girls can't wait to adorn themselves in ao dai (traditional dress), and give their elders the traditional Tết greetings before receiving the lucky red envelopes of blessing and fortune.
I've been busy in the kitchen testing and experimenting some of the traditional Tết food. One of them is bánh phục linh (tapioca cookies). My daughters watched me mold the toasted flour, and it magically turned into these little adorable cookies. They were thrilled and thought it's the coolest thing on earth.
If you grew up in Vietnam, these bánh phục linh will sure bring back childhood memories. These cookies melt in your mouth like no other Vietnamese dessert. They're simple and fragranced by the lightness of pandan and the richness of coconut milk.
*
RECIPE: Bánh Phục Linh
Made 48-50 cookies

Ingredients

1 bag (15 oz or 425 g) Tapioca Flour
3/4 cup Coconut Milk
3/4 cup Sugar
A bunch of frozen or fresh pandan leaves, washed, pat dried, chopped into 1 inch pieces
2 pandan leaves, tied each into a knot
Cookie Mold, use any mold you can find
Cookie Mold, use any mold you can find
*
Directions
Cooking Coconut Milk


*
Toasting Tapioca Flour

In a large skillet, toast flour and pieces of pandan leaves on low heat until the leaves are completely dried and crispy. Make sure to stir the flour constantly to avoid it from being burn.


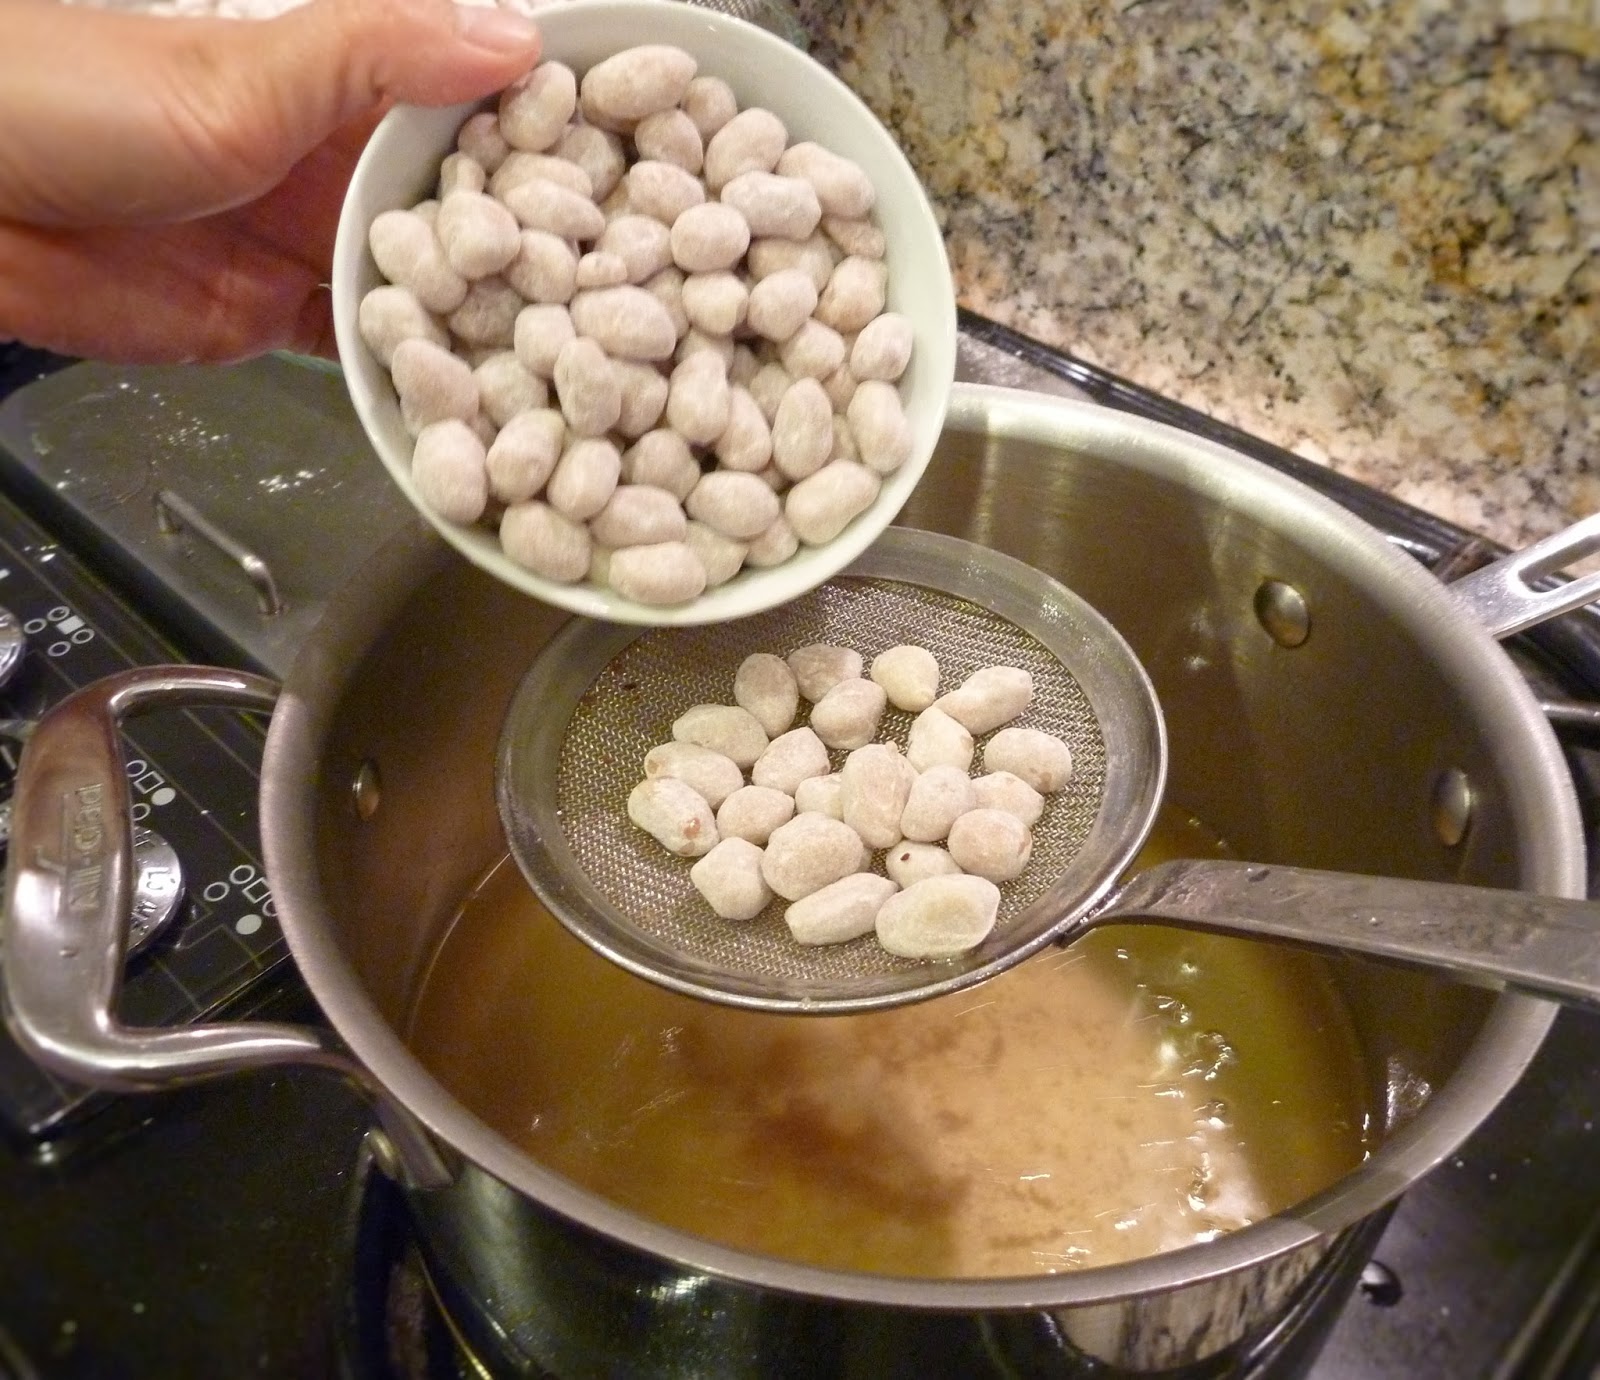
Remove dried leaves and lumps of dried flour from flour using a strainer.


Let it cool completely.
Let it cool completely.
*
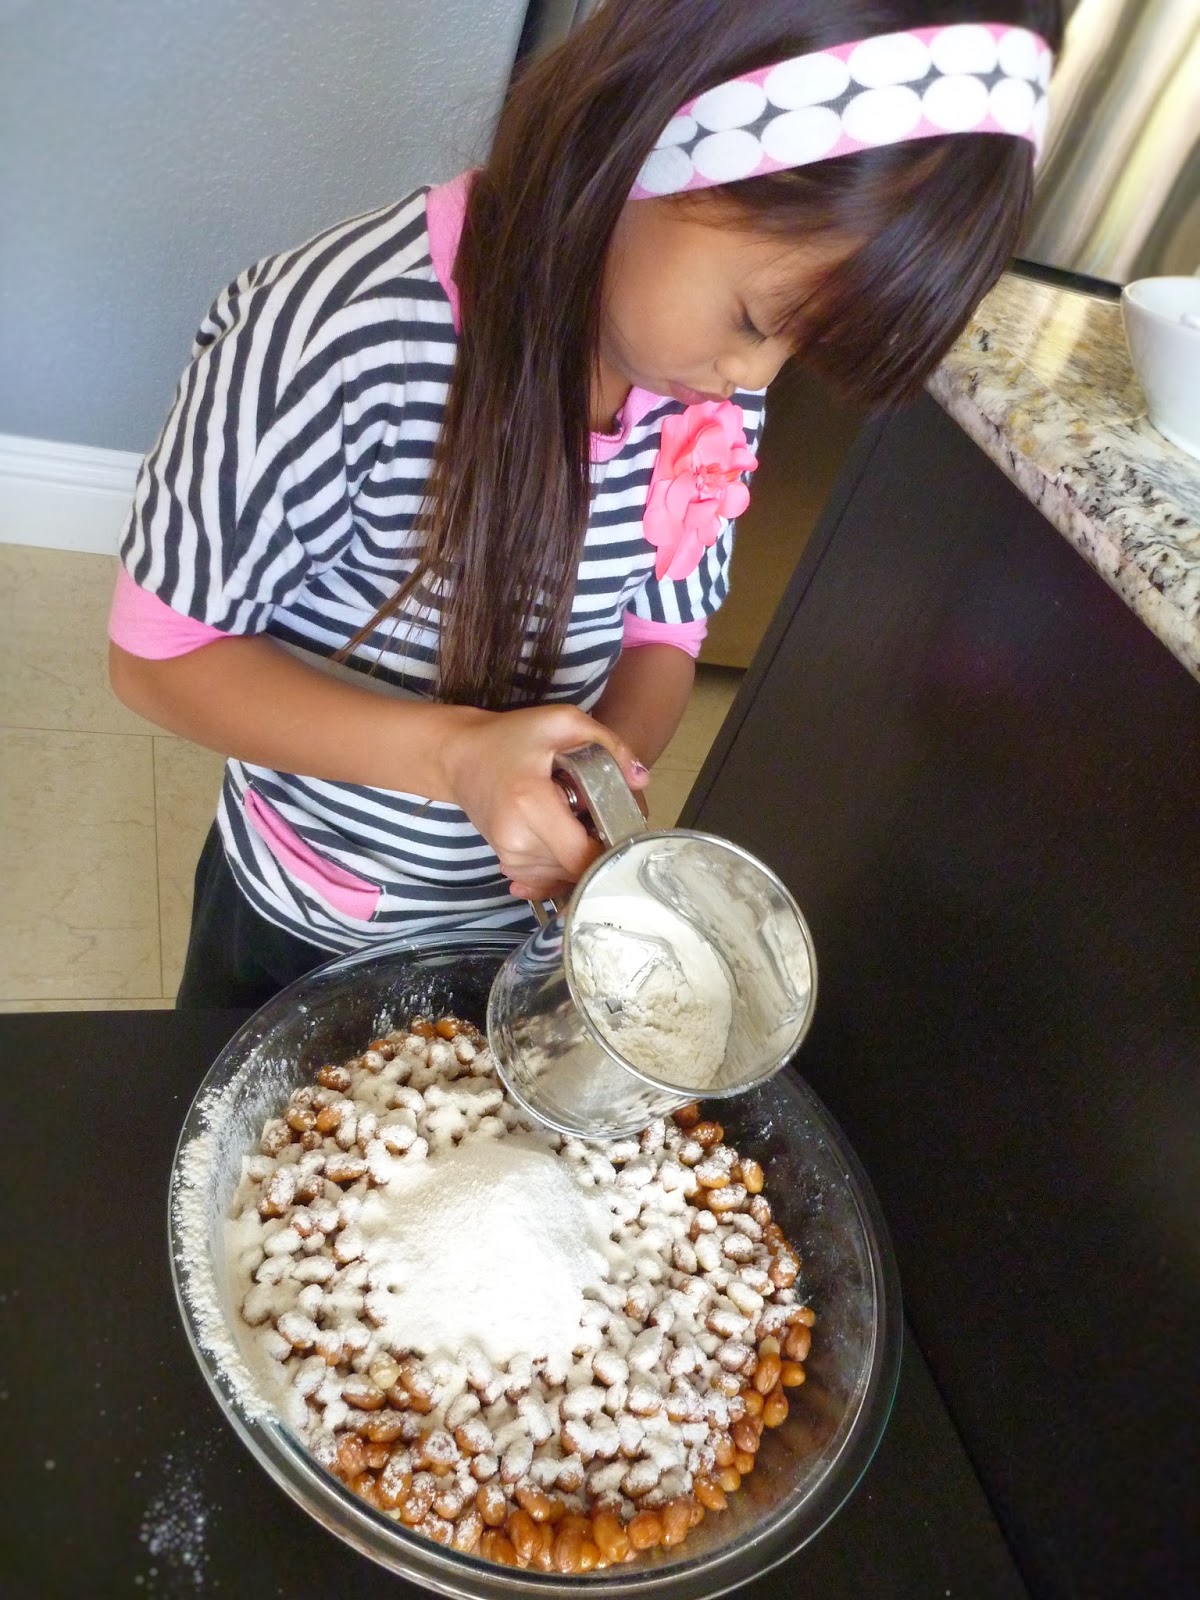
Mixing Flour

Gradually add coconut milk to the flour.


Using both of your hands to rub the flour.

If for some reasons, the flour is still clumpy after rubbing, transfer flour in the colander and scrape it off with a spoon or a spatula to achieve the fine and smooth texture.
Another way to mix the flour is by using the food processor. Be sure there's no meat residue that can contaminate the flour.

Avoid adding too much of coconut milk to the flour at once. In my experience flour tends to clump together when there is a lot of liquid and when wet and dry are combined too quickly. If the flour happens to be clump together, just add more toasted tapioca flour.
*
Molding Cookies

When flour is smooth, powdery and moist, it's time to mold the cookies.
Pour flour into the mold. Use your thumb to pack flour down tight.

Use a flat knife to scrape off the excess of flour and also to smooth the surface.
.jpg)
Flip the mold over and tap on the back or the sides of the mold to remove the cookies.

*
Presentation

Keep these cookies in an airtight container. Serve your love ones and friends with this delicious treat and a pot of your favorite tea. I am sure you'll find them - and yourself - coming back for more.
Enjoy!


.jpg)