Vietspices Search

Tuesday, January 4, 2011

Bánh Chín Tầng Mây (Nine Layers Cake)


One of the Christmas presents my daughters received was a tea set. So, they've been anxious to have a tea party. Tonight, they're waiting for me to finish making a cake for their tea party.


Bánh Da Lợn, which is another name for Chín Tầng Mây translates to "Nine Layer Cake" in Chinese which apparently is due to the number of layers on the cake. According to the Chinese, nine is a lucky number and it is an auspicious word to signify longevity. 

In Vietnamese, the meaning of "Da Lợn" is "Pork Skin" as the cake is chewy and has texture like pork skin. In addition, the cake has many layers, resembling of the pork belly (thịt ba chỉ) as the meat and fat form multiple layers.

All the ingredients that created this cake compliment each other well. The rice flour and tapioca are added to give a soft, more bouncy and chewier texture; mung bean is added to enhance the starchy taste; fresh pandan leaves (Lá Dứa) gives a sweet taste and a unique aroma to the cake; and coconut milk gives a sweet and nice rich flavour. Each layer of the cake can be separated and my kids love to peel them off to enjoy.
* * * 
*
RECIPE: Bánh Chín Tầng Mây

*
Ingredients

*
Making Flour Mixture 
1 1/2 cups Tapioca Flour
1/2 cup Rice Flour
1 can 13.5 oz Coconut Milk 
1 1/4 cups Sugar 
1 cup Water, for dissolving the sugar 
*
In a sauce pan, heat water and sugar until dissolved.  Set aside.  In a bowl, mix the rice flour and tapioca flour.  Add coconut milk and sugar mixture to the flour mixture until it is smooth.  Divide flour mixture into 2 bowls.
*
Making Mung Bean Paste and Mung Bean Mixture


1/2 cup Mung Bean
1 cup water
1 bowl of Flour Mixture
*
Rinse, drain and bring mung bean and water to boil. Reduce the heat to simmer with a pot lid on until soften. Make 1 cup of mung bean paste.
In a food processor, process 1/2 cup of a flour mixture bowl and 1 cup of mung bean paste until smooth. Mix mung bean paste mixture with the remaining flour mixture.

*
Making Pandan Mixture

6-7 Pandan Leaves (can be found at any Asian grocery stores in frozen section) or substitute for a few drops of pandan extract
6 tablespoons (3/8 cup) Water
1 bowl of Flour Mixture


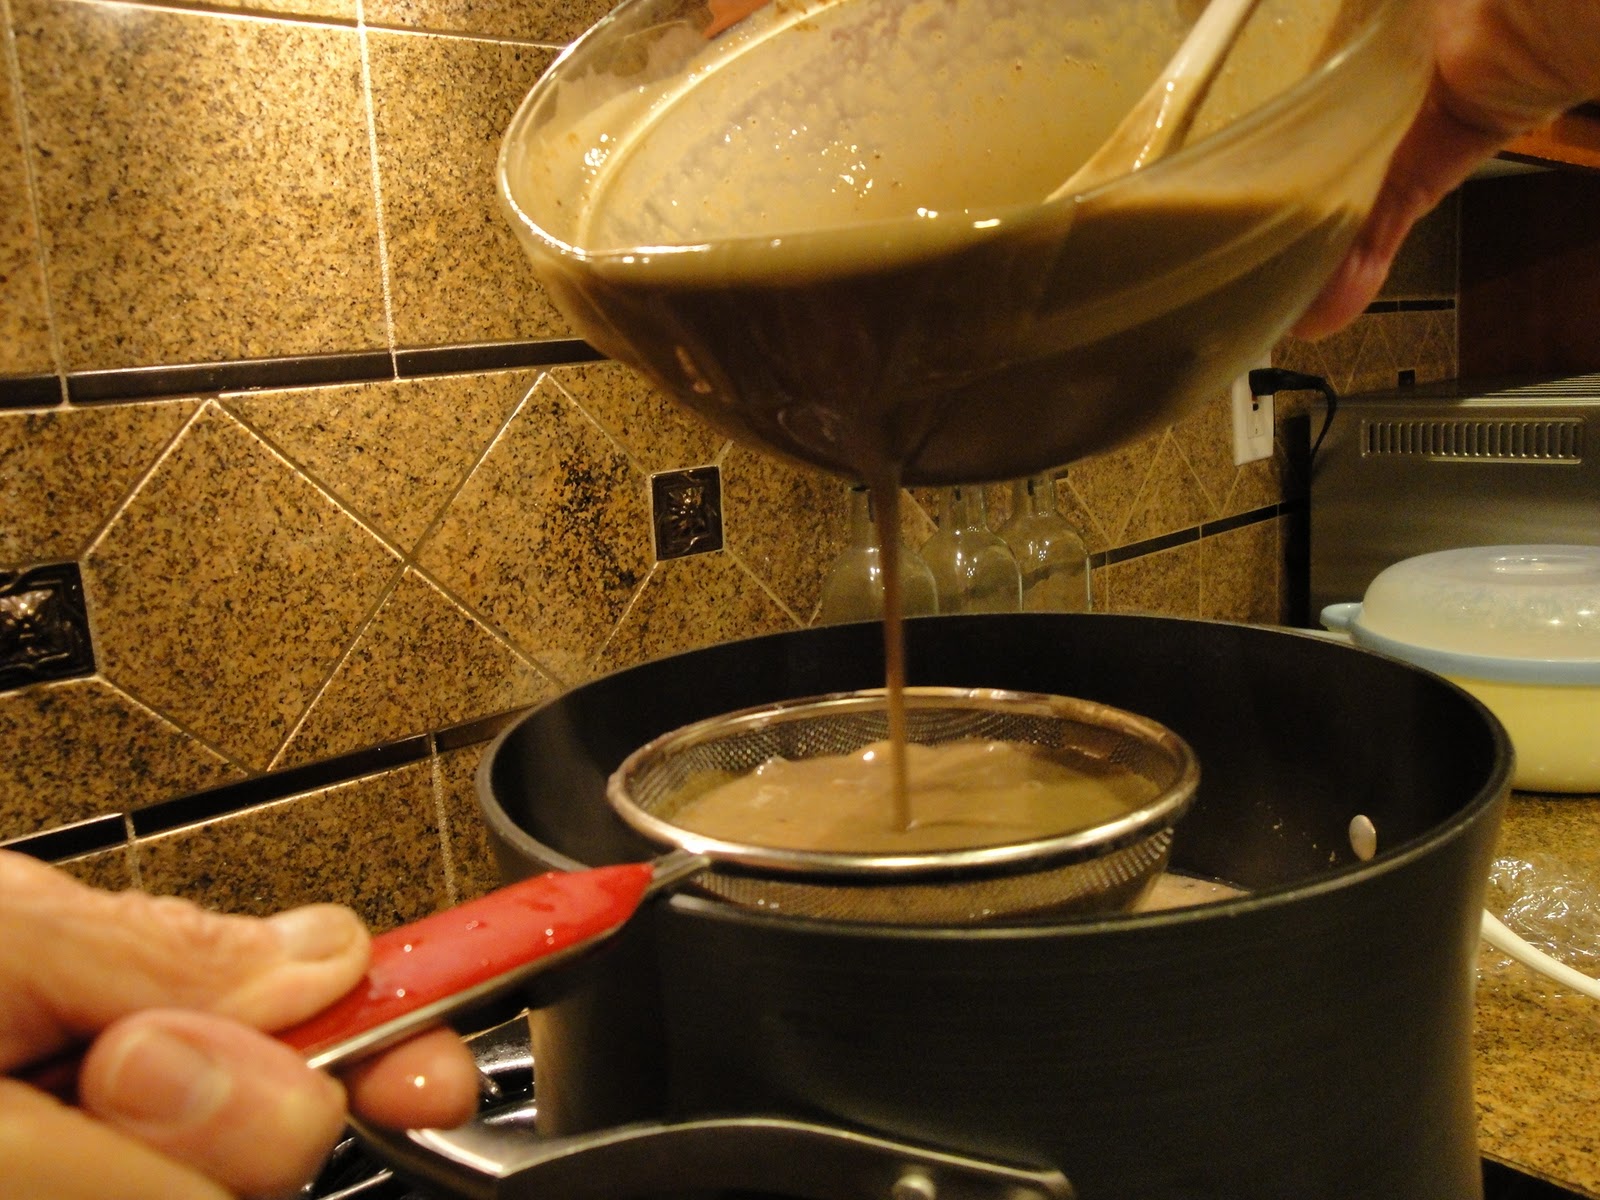
In a food processor, blend pandan leaves and water. If it's too thick, add 1/2 cup of a flour mixture. Drain the pandan through a fine strainer and discard the pandan residue. Add the pandan mixture to the flour mixture. For a darker color of green, add just a drop of pandan extract to the mixture. I didn't use it in mine, therefore, the cake has a very light yellowish in color.

Mung Bean Mixture and Pandan Mixture
*
Steaming Cake


Add water in a steamer and bring to a boil. Line parchment paper in a 8” pan then oil the pan. Place the pan into the steamer. Low the heat to Medium.
Start with the Pandan layer then Mung Bean layer. The nineth layer should be a Pandan layer, if the measurement is correct.
Pour about 2/3 cup of the pandan mixture to cover up the surface of the pan. Cover a pot with a kitchen towel then place a pot lid on top. This will prevent steaming water droplets from getting into the cake.
For each layer, steam for 4 minutes until the layer is just hard enough to support the next layer.
After the last layer, steam for another 10 minutes to make sure all the layers are cooked thoroughly.
Remove the pan from steamer and allow the cake to cool completely before slicing them.


Enjoy!

Saturday, January 1, 2011

Canh Bún (Water Spinach Noodle Soup)


At first glimpse of a pot of Canh Bún, many people may mistaken it with Bún Riêu (Crab Noodle Soup).  Similar to Bún Riêu, they both originated from Northern Vietnam but this dish is definitely different in taste and texture.  Canh Bún's broth and riêu (crab mixtured) are much lighter.  Canh Bún's riêu is soft and  fluffy while Bún Riêu's riêu is sturdy.  In addition, it doesn't have tomatoes; the noodles are thicker and they have the reddish color once cooked in the broth and eaten with boiled water spinach or rau muống.   


This is one of the dishes that I used to enjoy in the afternoons in Saigon as a kid.  I couldn't recall all the condiments in Canh Bún but I do always remember a distinctive reddish broth, thick noodles, fried tofu, huyết (conjealed blood), fried tofu and the main ingredient riêu made of field crab  paste (cua đồng xay) and rau muống.  As you know these are usually sold as street foods on carts or carried throughout the neighborhood in đồng gánh (bask̀ets). Everytime the lady with Canh Bún came by, the  extremely fragnant broth would turn in me into Povlav's dog.  


The other morning, I woke up and it was cold and immediately I wanted a comforting dish that would warm up our tummies.  Sure enough my senses lead me to the aroma of canh bún.  

Since I didn't have field crabs to make riêu, I used the combination of shrimps, dried shrimps,  crab meat and crab paste with Soya Bean Oil instead.  The riêu turned out not as fluffy as I had hoped but it was tasty.  I used Annatto seeds to get the color instead the red color powder which I wonder if any Asian grocery stores carry it; therefore, it didn't have the reddish color that you would see in canh bún.  I also added  escargot (ốc bưu) which is my husband and surprisingly my daughters's favorite.  My husband didn't care much for canh bún the first time he tried it in southern California, but after trying my recipe,  he requested it again a few days later.   This time, I went to an Asian grocery store to hunt for field crab paste.  I came upon the last 2 jars.  


Bare in mind that the smell of field crab paste is quite pungent but has a mild taste.  I remember seeing my friend's family preparing this paste from grounding whole field crabs in a mortar. 
Canh Bún made with crabfields takes less time to prepare as it's already made into paste.  In the recipe below, there are directions for both riêu cua (crab riêu) and riêu cua đồng (field crab riêu).  Authenticity would favor the recipe with field crabs.
* * *
*
RECIPE: Canh Bún

 
Canh Bún with  Riêu Cua Đồng (Field Crab Riêu)
*
Ingredients


Pork Bones or Chicken Bones, to make broth
If used Chicken Broth, mix 1 part broth and 1 part water
1 jar of Crab Paste with Soya Bean Oil (I prefer this one since it's less pungent than the jar of shrimp or crab paste labeled as Gia Vị Nấu Bún Riêu)
2 cups Shrimps, shelled, deveined and minced finely
Dried shrimps (washed, soaked until softened, then mince finely), optional
2 containers Field Crab Paste (Cua Đồng Xay), if used
2 Eggs, for riêu cua đồng
Salt
Fish Sauce
Shrimp Paste (Mắm Tôm)
Rock Sugar
1 large bunch of Water Spinach, cleaned and cut about 3 inch lengths (use Cải Xanh/Mustard Greens if water spinach is not available)
A bag Fried Tofu Pouches
Cooked Pork Blood, cut into cubes
Large Rice Noodle (I used Bún Tầm Bì noodle)
Annatto Seeds (Hột Điều), substitute for red color powder
Lime or Tammarind paste (Nước Me) 
Chili Sauce (Tương Ớt)
Spring Onion, finely chopped
Fried Shallot, optional

Cooking Rau Muống (Water Spinach)

Blanch Rau Muống with half teaspoon of salt, transfer into a bowl of ice water for a few minutes  to keep it crunchy and it won't lose the color.  Drained and let dry.

Cooking Noodle (Bún)

Cook the noodle until al dente, drained and then let dry.  If used Bún Tằm Bì noodle, soak it for a few hours since the size of these  noodles is big and it takes a long time to cook if unsoaked.  Then cook it at medium heat until soft.

Making Annatto Oil (Dầu Hột Điều)
In a small saucepan, bring annatto seeds and 2 tablespoons of oil over medium heat.  Stir constantly, until the oil becomes a rich, orange-red color, about 3 minutes. Add a piece of garlic to eliminate the annatto seeds smell.  Remove from the heat and allow to cool. Strain the oil and discard the seeds.

Making Tamarind Paste (Nước Me Chua)
Mix a tablespoon of tamarind with a couple tablespoons of hot water.  Smash it then strain it and discard the tamarind remains.
You can also buy tamarind paste (Nước Me Chua) in a container from any Asian grocery stores. 

Making Crab Mixture (Riêu)

Combine dried shrimps, if used, crab paste with Soya Bean Oil, shrimps and about 1/2 tablespoon of shrimp paste. Mix thoroughly and set aside for later. 

Making Field Crab Mixture

Mix eggs with field crab paste.  You can also combine the crab mixture with field crab paste if you prefer.  Pour the mixture into a strainer and in to the semi-boiling broth. Make sure the broth is not boiling otherwise  the field crab mixture will break apart. Once the field crab mixture conjealed into a big clump, remove it and set it aside. When ready to eat, just hack a piece off the big lump for each serving.

Making Broth
Rinse and wash bones. Bring bones to boil to get rid of scums then rinse again.  Simmer bones in a pot of water with salt and rock sugar.  Let simmer for an hour.  Remove the bones.  If using chicken broth, ignore the step above.

Turn the heat to medium.  Add a spoon of crab mixture in the broth one at a time. 
Add fried tofu pouches and conjealed blood cubes. Add at least 2 tablespoons of shrimp paste,
additonal sugar, salt and fish sauce for flavor, be careful not to over salt the broth.  Without shrimp paste in the broth,  it wouldn't be canh bún. 

Canh Bún Presentation
Canh Bún with Riêu Cua (Crab Riêu)

In a separate pot, bring broth, a couple teaspoons of annatto oil and noodle to boil. 
Transfer to a bowl.  Top with riêu (crab  mixture), fried tofu, huyết (conjealed blood) and rau muống (water spinach) on a side of the bowl.  Garnish with spring onion and fried shallot.
Annatto oil still doesn't give noodles the reddish color. 
Red color powder (bột đỏ)would be best for Canh Bún.

Serve with a side dish of rau muống, lime or tammarind juice and chili sauce. 
Enjoy!

Saturday, December 25, 2010

Mứt Vỏ Bưởi Bọc Chocolate (Candied Grapefruit Peels Dipped in Chocolate)

 
My older daughter insisted   that the candied orange peels  should be deeped in chocolate but I didn't have any chocolate chips in my pantry.  By the time she reminded me, all the candied orange peels were gone.  As you may have guessed she wasn't very happy.  So I made a trip to the grocery store and bought a grapefruit and chocolate chips to make Candied Grapefruit Peels Dipped in Chocolate for her instead.


I really like how the grapefruit peels look. It has a great brilliant yellow; its texture fine and somewhat gritty at the same time; its zesty citrus taste is refreshing.  And once covered with syrup and coated in superfine sugar, they're irresistable. 

My daughters and I had so much fun drizzling and dipping chocolate on each of the grapefruit peel.  We decorated these candied grapefruit peels with the frosted cranberries that we made last night.  This ensemble is almost too beautiful, but I couldn't resist . . . yum. 
Click to play this Smilebox slideshow
Create your own slideshow - Powered by Smilebox
Create a free slideshow

Frosted Cranberries


I love to look at  these sparkling and festive sugar coated frosted cranberries.  They bring to mind the magic of winter. And even though I live in California's Central Valley, I can envision snow flakes draping over the evergreens and children playing in the snow.

These cranberries are absolutely beautiful for use as a garnish and delightful to enjoy.   Sweet and sour, crisp and crunchy, and with a hint of natural saltiness, these flavors would burst into your mouth as you sink your teeth into them; my mouth is salivating just writing this sentence. Needless to say this treat is meant for the sour tooth. And for those who love berries but cringe at the mention of its tartness, the coated sugar really helps.  So try one . . . maybe two even.

these cranberries coated with superfine sugar
* * *
*
RECIPE: Frosted Cranberries
 *
Ingredients

2 tablespoons water
1 tablespoon light corn syrup
1 package fresh cranberries (12 ounce)
3/4 cup superfine granulated sugar or granulated sugar 
1 bag of vanilla sugar, optional
*
Directions

Rinse and drain craberries.
In a medium bowl, stir together the water and syrup until blended.
Coat cranberries with this mixture. 
Mix sugar and vanilla sugar in a bowl or spread it out on a baking sheet. 
Use a slotted spoon to transfer a few cranberries at a time to the baking sheet. 
Roll the cranberries to coat with sugar. 
Use a slotted spoon to scoop them out.   
Place coated cranberries in a single layer on a baking sheet or a  rack.   
Dry at room temperature for 1-2 hours.


these cranberries coated with granulated sugar

HAVE A JOLLY HOLIDAY SEASON!


Wednesday, December 22, 2010

Mứt Vỏ Cam (Candied Orange Peels)


One of my blog fans saw this Candied Orange Peels recipe online and thought of me; she sent me the link so I can check out all the holiday gift ideas.

These sweet and zesty candied orange peels not only sounds healthy but also looks beautiful and appetizing. It would add a nice touch to the holiday ambience. I decided to give it a try. I adjusted the original recipe and also created flowers using the tops and bottoms of the orange peels to make a beautiful garnish. As an aside, the orange syrup from cooking the orange peels can be used in with hot tea.  Add just a teaspoon of orange syrup into a cup of hot green tea to enhance its aroma.

These candied orange are completely dry with excess sugar frosting

Once done, my kids and husband could not stop munching on the candied orange. They're a great snack on long trips or for watching a movie. I think they pared well with a hot unsweetened tea. Since these are best when shared, I made a jar of the candied orange for my college roommate who traveled from southern California to visit us. I sent some to my family in Texas. At least they'll have something new to try this holiday season.


Merry Christmas to all !
* * *
*
RECIPE: Mứt Cam
*
Ingredients


12 thick-skinned Valencia or navel oranges
4 cups sugar, plus 1 cup for rolling
3 cups water
*
Directions


Cut the top and bottom of the orange then make them into flower shapes. Using a vegetable peeler, peel off pieces of the skin, cutting from top to bottom. If you want a longer length, peel all around the orange. Cut the peel into strips about 1/4-inch wide or leave in natural shaped pieces.

  
Place peels in a sauce pan and with water to cover. Bring to a boil with high heat and simmer for a couple minutes. Drain and repeat two more times depending on how much of the original scent you want to preserve.
Mix sugar with water. Bring to a boil. Add orange peels and turn heat down to a simmer. Simmer the orange peels gently for about 45 minutes over low heat.

Drain the peels. Keep the syrup to make lemonade hot tea or you can reuse it to make another batch of candied orange.


Place 1 cup of sugar in a deep plate. Dredge the peels in the sugar until they are coated, and place them on a cooling rack to dry for a 4-6 hours. You can also place them on a baking sheet lined with parchment paper and place the baking sheet in a warm oven at 200 degree and allow them to dry out. It should take about one hour. Make sure to check them often to prevent burning.


Once the peels are completely dry, scrape off any excess sugar clumps. Store them in jars and they can be kept for weeks.


Candied peels can be dipped in melted chocolate, enjoyed plain, or used them to decorate cake or cookies.

Wednesday, December 15, 2010

Bánh Khoai Mì Nướng (Cassava Cake)


While a friend and I were shopping, she suddenly had a "craving" for Bánh Khoai Mì Nướng which is a simple and delicious cake made from fresh cassava root. So the very next day, I went and bought 4 bags of grated cassava root. I used 2 bags to make one cake to satisfy her "craving".  The other 2 bags I planned to have her take home and try it out on her own. But as soon as the cake hits the table, it was gone. A few other friends were interested in learning how to make it as well so we used the other 2 bags.

Bánh khoai mì nướng has a great aroma filled with sweet and buttery tones from the cassava and coconut mix; it has a chewy consistency and the brown crust is to die for.


Cassava root is very rich in starch. Similar to sweet potatoes, it contains significant amounts of calcium, dietary fiber, iron, manganese, phosphorus, potassium, vitamin B6 and vitamin C. Dietary fiber has been associated with lowering the risk of cardiovascular diseases, colon cancer, and helping control diabetes. A recent study conducted in the Philippines showed that cassava significantly decreased total cholesterol levels, decreased low density lipoprotein (LDL) cholesterol (considered as “bad” cholesterol), and may help lower triglyceride levels due to its high total dietary fiber content. Other studies show that cassava may help support the nervous system and help alleviate stress, anxiety and irritable bowel syndrome. It's been reported that cassava leaves can be used to treat many ailments such as headaches, fever, diarrhea, and help increase stamina. 


After researching the health benefits of cassava, I think it makes me want to feed my family cassava root and sweet potato everyday :-). 

Frozen grated cassava is availabe at most Asian supermarkets. If you want to make it right away after you bring it home from the store, just soak the package in water for about 15 minutes and it should be thawed and ready to use. Make sure to place the package in a big ziploc bag before soaking in water. This will prevent water gets inside the cassava bags since most of the frozen cassava bags have tiny holes on them and they're hard to see. 
*
RECIPE: Bánh Khoai Mì Nướng

Ingredients

2 bags frozen grated cassava
1/2 can condensed milk 
1/2 cup sugar
1 1/2 cups coconut milk 
2 teaspoons pure vanilla extract 
1/4 cup tapioca flour
1/2 teaspoon oil, for greasing the baking pan
*
Directions

Preheat the oven to 375oF. Put oven rack on the 2nd lowest level of oven. Grease a baking pan well. Put it in the oven to keep it hot.
*
Preparing Cassava
Squeezed out the liquid if any.  If using fresh cassava, remove skin and grate it or cut into small thinly pieces then process it in a food processor until fine. Squeeze the juice out of the grated cassava. Discard the juice. 
*
Mixing Cassava
In a large bowl, mix all the ingredients together.  Remove a baking pan from oven and pour the mixture into it.  Give it a shake to even the top out. 

Put it back into the oven and bake for about 40 minutes.  Turn up the temperature to 400 F and bake for another 5 minutes or until the top turns golden. Remove from oven and set aside to cool.

*
Presentation


Enjoy a slice of Bánh Khoai Mì Nướng with a cup of your favorite hot tea or coffee!
*